
I have multiple websites for different projects that I have going on. I like to self host those websites (wordpress) till they become big enough that I am willing to pay wordpress.com for hosting them for me. There are also situations when I want access to google analytics and prefer to self host. My wordpress multi-site (google cloud) costs about $25 a month, and I host about 8 websites there. A similar level of hosting control would cost me the same amount per site per month.
Requirements:
- WordPress Multi-site hosting
- Should support SSL (https only)
- Separate independent websites for my domains which are parked in google domains.
- Support google analytics
- Ability to install plugins
References
There are multiple sites that I have referenced to get my multi-site hosting setup. Since there isn’t one single place that has the steps I needed, I wrote this.
https://onepagezen.com/free-ssl-certificates-wordpress-google-cloud-click-to-deploy/
https://www.siteyaar.com/google-cloud-wordpress-multisite/
https://onepagezen.com/setup-wordpress-google-cloud-platform-click-to-deploy/
I would not have got my setup going if it wasn’t for the links above. My post is how I mixed and matched the instructions from these links and setup my site: samyeer.com
Required:
You will need a google cloud account (sign up at cloud.google.com), they have a generous free tier that will cover you easily for an entire year.
You need a domain management service. I use google domains.
You will need to setup letsencrypt based wildcard certificates.
Setting up wordpress multi-site
- Go to the google cloud console.
- Click on Main Menu, and select Marketplace.
- Search for wordpress multi-site
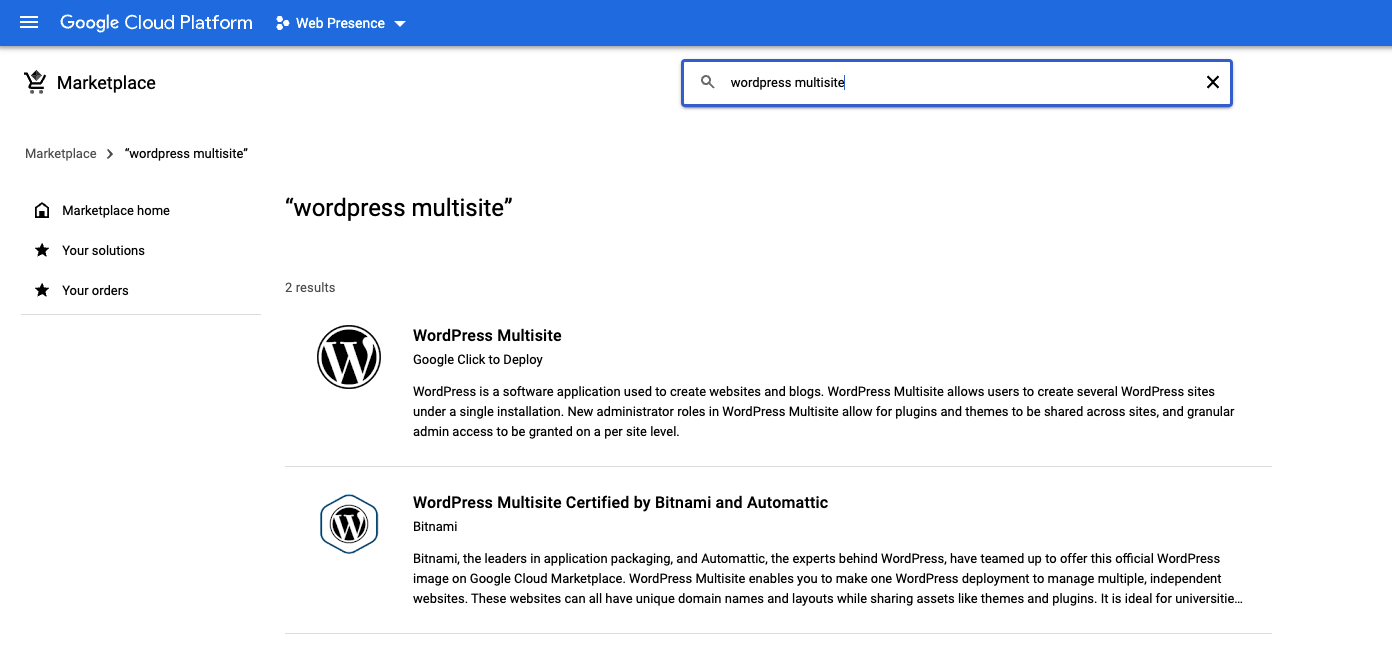
- Select “WordPress Multisite” – Google Click to Deploy
- Click launch
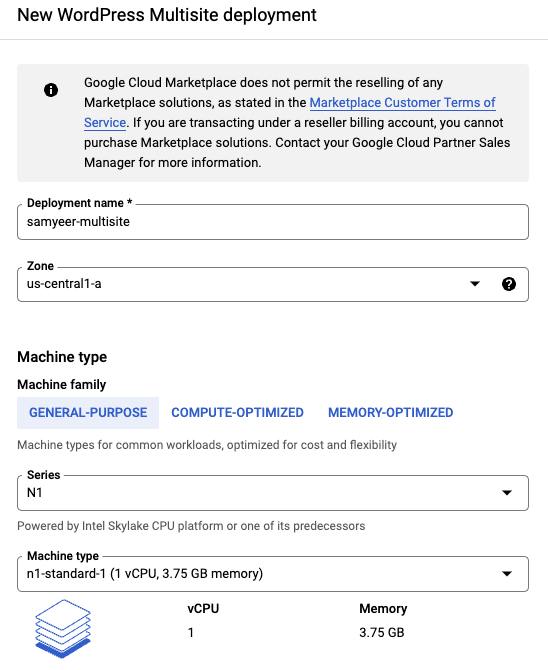
give a deployment name. I am setting this up for samyeer.com so I will use that. samyeer-multisite
Select zone based on where you want the site to be. If your site is going to be focused on US then us-central.
Select the processor series. Do some mix and match, figure out the cost that works for you. Remember that there will be some impact on performance. I am doing this with n1-standard-1. Decide if you want ssd or normal disk, it’s $1 difference. Just go for the SSD.
Enable https.
Then leave everything else…and deploy.
It will take some time to deploy the instance. It will create some admin passwords. You will need to change them sometime.
That was simple enough.
Setup a static ip
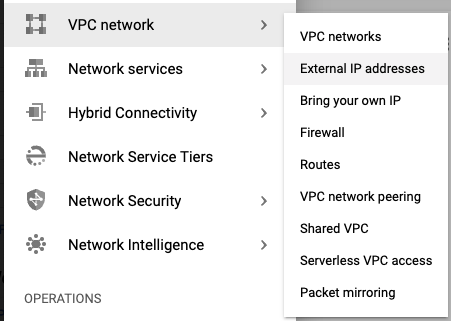
Your VM will get a dynamic IP address. It’s a good idea to convert that to a static ip. From the Menu select VPC Network | External IP Address.
click on Reserve (next to the ip address), and give it a name. I set it to samyeer-multisite-ip
You will get a single IP address. Your wordpress setup is functional with an IP Address; but then you want to setup the domain to point to this IP address.
Setup DNS for your domain
Selecting what domain name is very important. Pick a domain name that you will likely *NEVER* want to move to another hosting service. This is because a lot of setup will be linked to the multi-site domain.
To put it another way, the reason I am writing this blog post is because I had setup an important domain as primary, and my rebuilding my setup is to extricate that domain so that I can move it to a paid supported hosting service. (the things I do to save money, ah well there is also the learning). Now if I need to do this again I have a reference.
Now go to your domain server and setup an “A” record. Put the static ip address you got in the A record. Here is what my records look like in google domains.
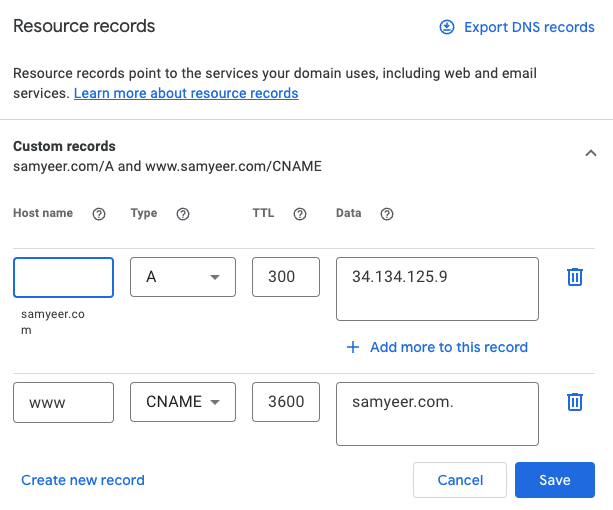
Wait for a bit, your server will propagate.
This is a good time to get a coffee and wait a bit. Sure google propagates very quickly, but if your dns has not propagated it can get pretty frustrating.
Verify that your domain name is working before you proceed. Go to: http://<your-domain-name>
Setup HTTPS
This took some time to figure out. Need to reference the setup in siteyaar, and most importantly go through till the end where forwarding http to https is also covered. Very important.
Go to the Google console, and from the menu, select Compute Engine | VM instances. Click on the “SSH” button next to the VM you have setup.
sudo apt-get install -y certbot python-certbot-apache -t stretch-backports
This will install certbot which is the letsencrypt agent.
Now lets get the certificate:
sudo certbot certonly --webroot -w /var/www/html/ -d your-domain-name -d www.your-domain-name
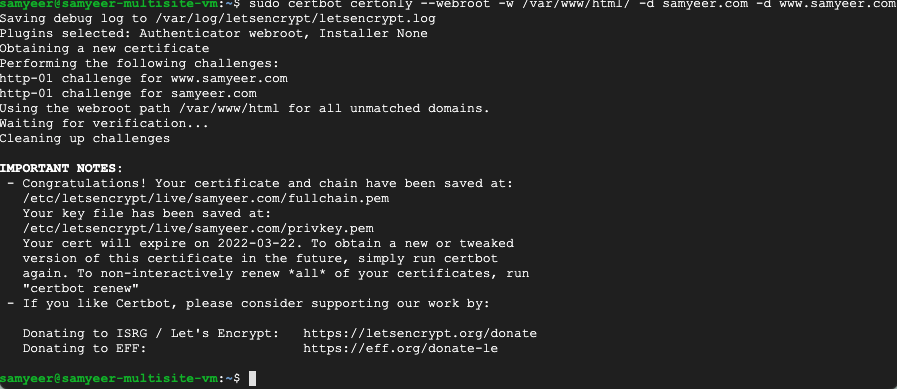
You are going to need those paths that it generates along with the certificate. Run the command to verify that the certificates are setup.
sudo certbot certificates
Now make some modificaations to the ssl configuration for apache.
sudo nano /etc/apache2/sites-available/default-ssl.conf
And add the following lines after “DocumentRoot /var/www/html”
<Directory /var/www/html/>
Options Indexes FollowSymLinks MultiViews
AllowOverride All
Order allow,deny
allow from all
</Directory>

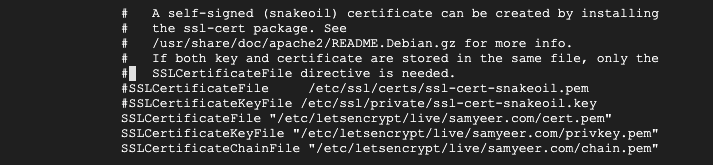
Go down in the fill to the section where the certs are stored. Comment out the two existing items and add these three lines
SSLCertificateFile "/etc/letsencrypt/live/your-domain-name/cert.pem"
SSLCertificateKeyFile "/etc/letsencrypt/live/your-domain-name/privkey.pem"
SSLCertificateChainFile "/etc/letsencrypt/live/your-domain-name/chain.pem"
This should now look like:
Hit Ctrl – X and Y to save.
Now run the following commands:
sudo a2enmod ssl
sudo a2ensite default-ssl
sudo service apache2 restart
Now you have a working HTTPS. But this is not done yet. You now have a working http://samyeer.com site and an https://samyeer.com site. Next you need to redirect all http requests to the https site.
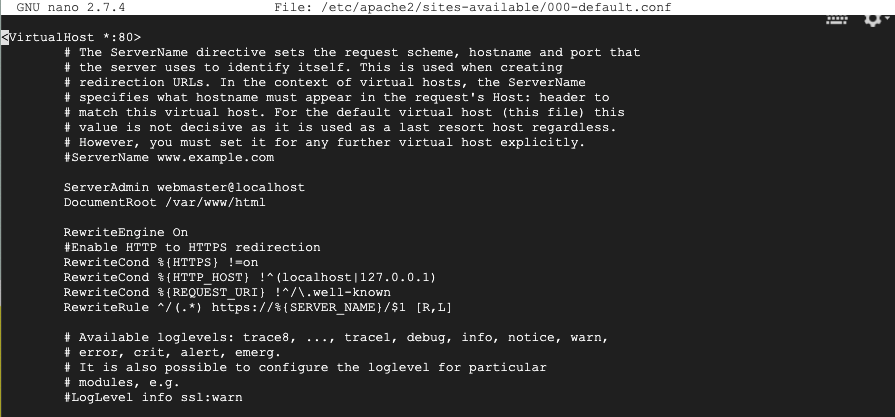
sudo nano /etc/apache2/sites-available/000-default.conf
Add the lines below.
RewriteEngine On
#Enable HTTP to HTTPS redirection
RewriteCond %{HTTPS} !=on
RewriteCond %{HTTP_HOST} !^(localhost|127.0.0.1)
RewriteCond %{REQUEST_URI} !^/\.well-known
RewriteRule ^/(.*) https://%{SERVER_NAME}/$1 [R,L]
Thats it. HTTPS setup complete. If you try to go to an http site it will automatically be forwarded to the https site.
One more thing
The ssl certificates that you just setup are valid for 90 days. You need to setup to renew them every 90 days. Setting up crontab will automatically check for a certificate due for renewal and renew it.
sudo crontab -e
Add the following line at the end. Remember to add a newline after the command.
* 3 * * 6 certbot renew && /etc/init.d/apache2 restart

Configure WordPress to use your domain
This is slightly tricky. You need to use your domain name to login to the wordpress site. This will redirect you to a login page that will show your ip address.
https://<your domain name>/wp-admin
Login with the username and password that you got when you deployed the server.
go to Settings | General Settings and set the domain name for your site there. Remember to set it up with the HTTPS address. Yes my screenshot is wrong. Its too much work to fix it. 🙂
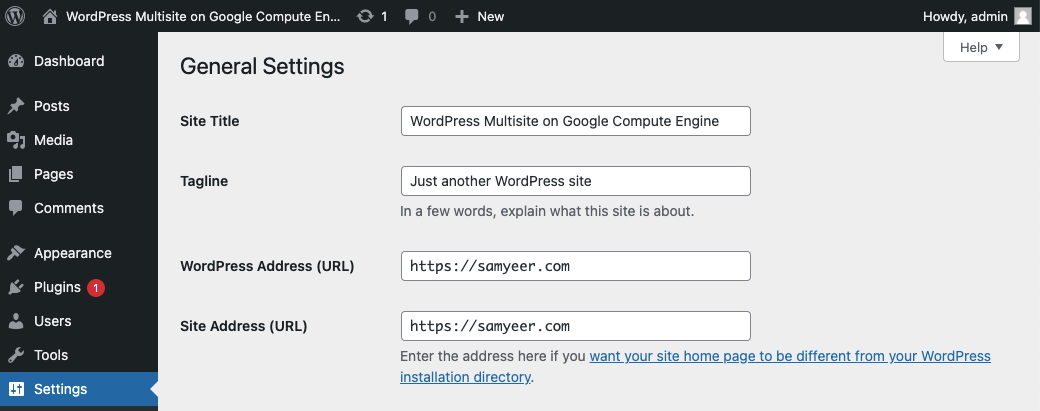
Save the changes This will likely make you login again.
You now have an https based wordpress setup.
Setup the Multi-site
In the wordpress menus Tools | Network Setup. Select Sub-directories from the radio button selection. The reason I am doing this is because I will be setting up separate dns names to point to the site. It will get clearer later.
Take the time to set the Network Title to something you like. If you dont do it now you likely never will.
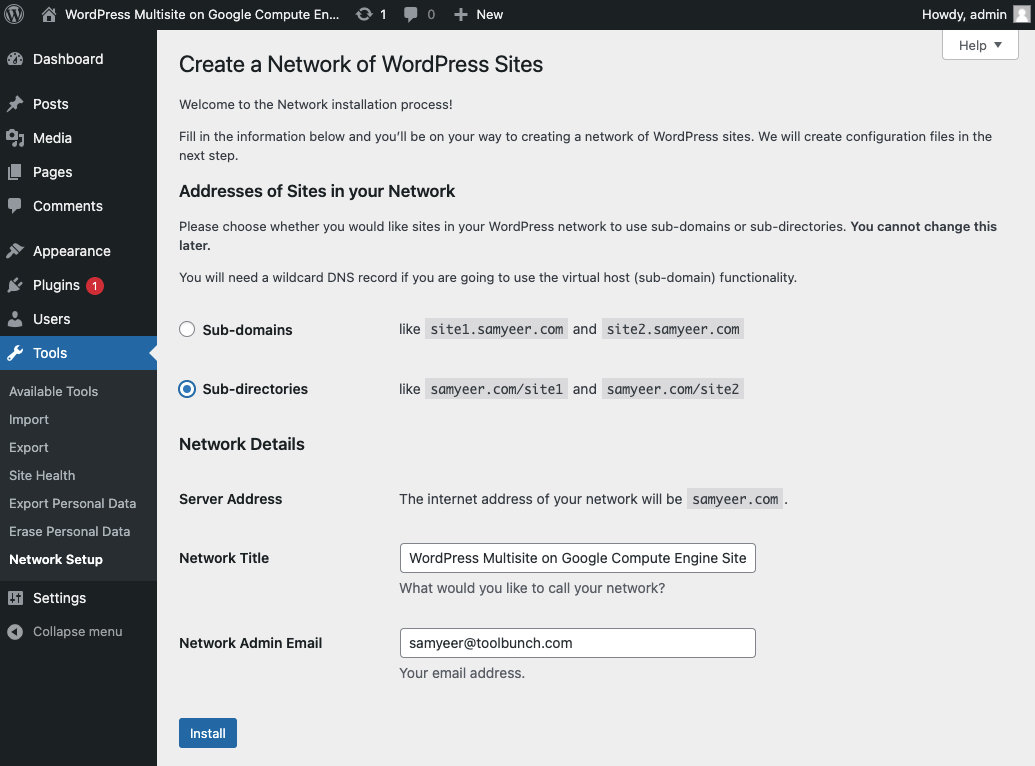
Click on Install. Now this gets a little hairy (difficult/complicated).
Setup the Multisite configuration
Go to the Google console, and from the menu, select Compute Engine | VM instances. Click on the “SSH” button next to the VM you have setup. You likely already have the VM window open somewhere use that.
Run the command:
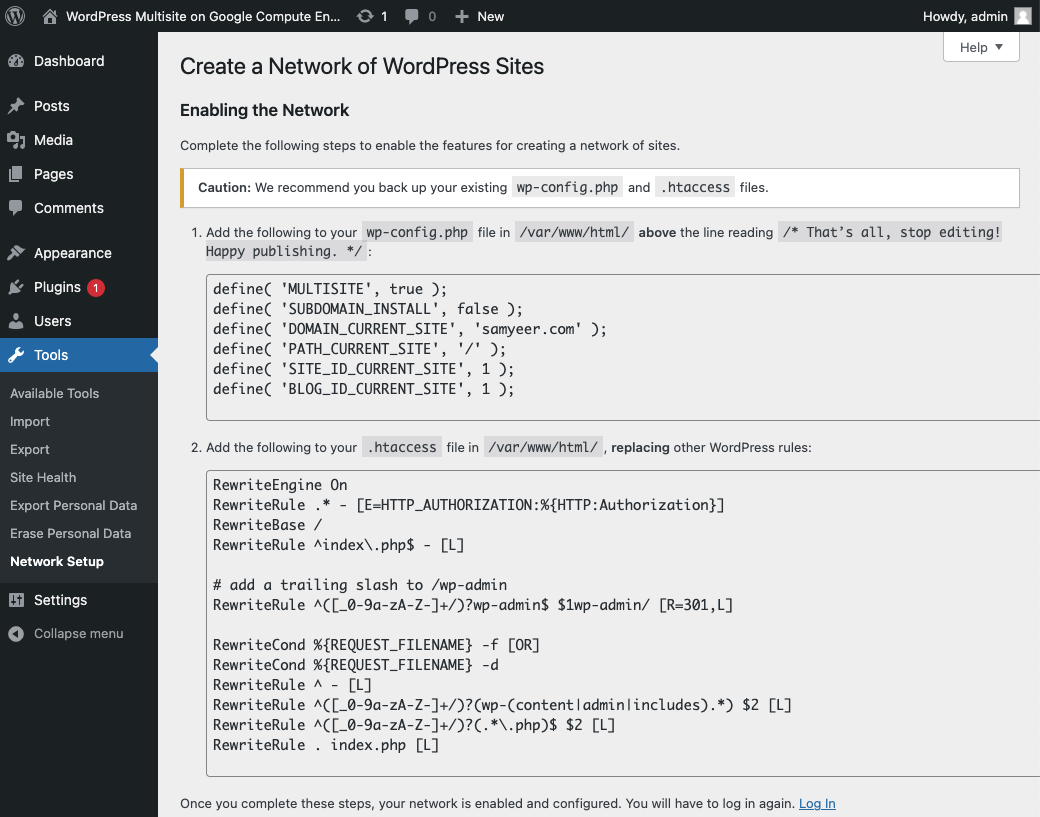
sudo nano /var/www/html/wp-config.php
search for: define (WP_allow_MULTISITE’, true);
Paste the first section of text (dont copy this text below, copy from your wordpress instance):
define( 'MULTISITE', true );
define( 'SUBDOMAIN_INSTALL', false );
define( 'DOMAIN_CURRENT_SITE', '<your domain name>' );
define( 'PATH_CURRENT_SITE', '/' );
define( 'SITE_ID_CURRENT_SITE', 1 );
define( 'BLOG_ID_CURRENT_SITE', 1 );
Ctrl + X; Y will save. Make sure that you have not got some erroneous characters in there.
Run the command:
sudo nano /var/www/html/.htaccess
And paste the second part of the network setup. This will replace whatever was there in the <IfModule mod_rewrite.c> section.
RewriteEngine On
RewriteRule .* - [E=HTTP_AUTHORIZATION:%{HTTP:Authorization}]
RewriteBase /
RewriteRule ^index.php$ - [L]
#add a trailing slash to /wp-admin
RewriteRule ^([_0-9a-zA-Z-]+/)?wp-admin$ $1wp-admin/ [R=301,L]
RewriteCond %{REQUEST_FILENAME} -f [OR]
RewriteCond %{REQUEST_FILENAME} -d
RewriteRule ^ - [L]
RewriteRule ^([_0-9a-zA-Z-]+/)?(wp-(content|admin|includes).) $2 [L]
RewriteRule ^([_0-9a-zA-Z-]+/)?(..php)$ $2 [L]
RewriteRule . index.php [L]
Now logout and log back into the wordpress multisite. Notice at the bottom of the wordpress window (above) there is a link to re-login.
Notice that if you were to click on MySites (top left) you will see:
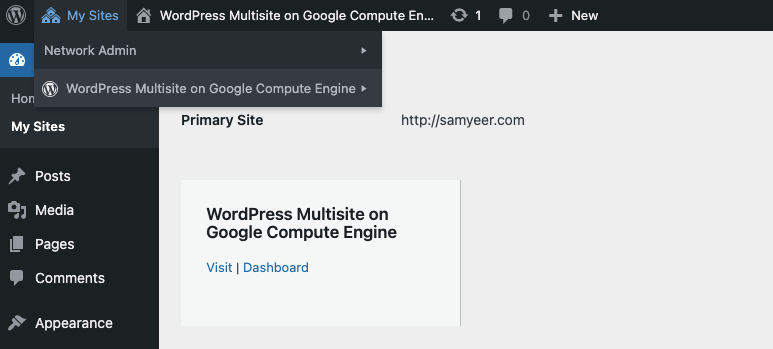
The first is a dashboard to administer your network. The second is your default site as the first site in your network.
Your setup is now complete.
What next
You now have:
- A WordPress multisite setup
- It works with https (any http requests are redirected to https)
- It will work with multiple domains.
How you configure your wordpress setup is up to you. Please remember that your web sites cannot add plugins and theme’s. You will need to go to go to the Network admin dashboard to select and setup themes etc. Once you add them you will need to “Network Activate” them, and then you can use the plugin in your site.
I am going to go through adding a new site (and updating HTTPS for that new site).
Adding a new site/domain to your network
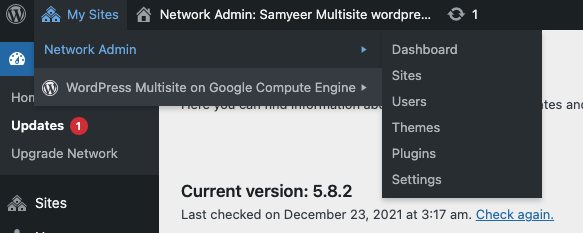
- Go to My Sites | Network Admin | Dashboard
- Click on Sites | All Sites
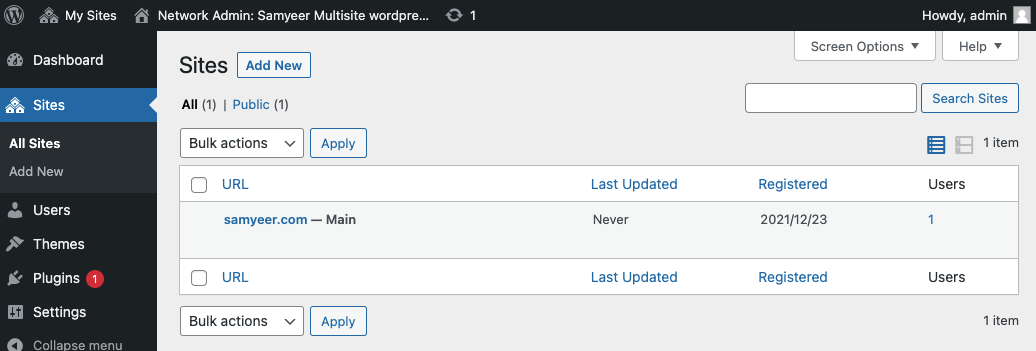
Click on add new
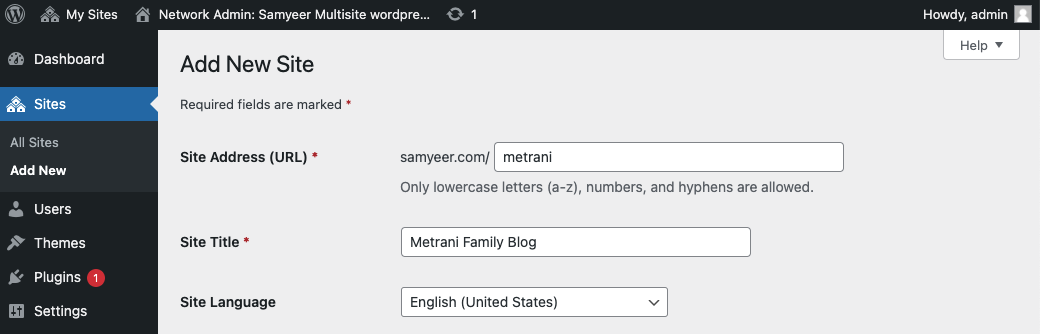
Enter the name of your site. Click save.
Your site is now setup (but only as a subsite of your main site), now go to the Google domains and setup the “A” record pointing the second domain to this server. You need to get the IP address from Google cloud console (or the A record for your first site). See the instructions above for setting up the A record.
You are not done yet.

Click on “Edit” for the new site you setup (in my case samyeer.com/metrani.
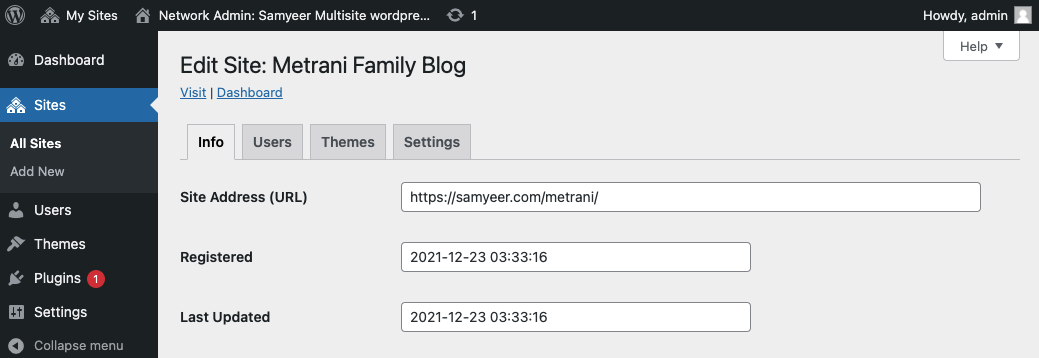
Change the site address URL to the domain you have. In my case https://metrani.com and save the changes.
Adding HTTPS support
You need to add the domain that you added to the certbot certificate.
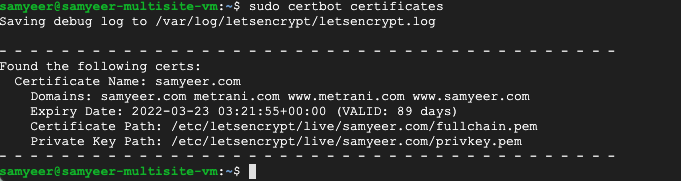
To see the domains you presently have setup run the command:
sudo certbot certificates
sudo certbot certonly --webroot -w /var/www/html/ -d <your-multisite-domain> -d www.<your-multisite-domain> -d <added-domain> -d www.<added-domain>
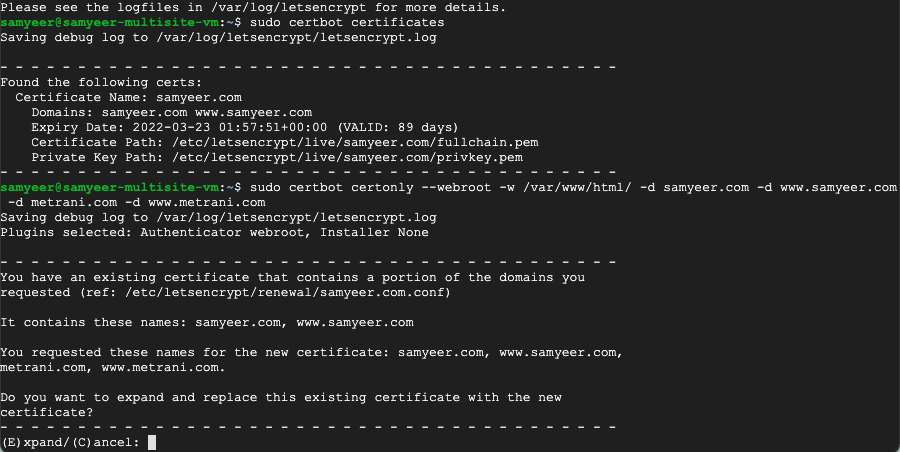
Select “E” to expand the certificate.
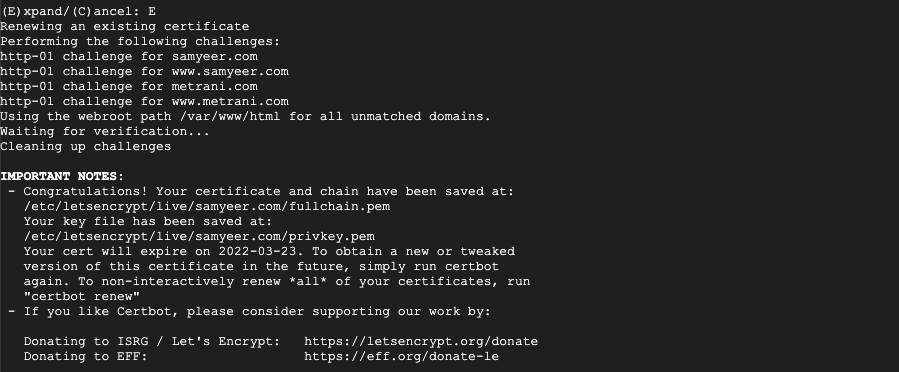
Run this command to verify that you have the certificates correctly set.
sudo certbot certificates
Dont forget to run the following command to make sure Apache loads your new certificate.
sudo service apache2 restart
And now you are done.
In closing
This blog post was written over a long period. I went through some pain in figuring out what I wanted, and have restarted these steps many time.
I had to rebuild this again when I wanted to move one site out of the network to an independent site of its own (needed to handle more volume of traffic). I found that I needed to re-build this because the site I wanted to move was the primary site, and moving it directly would require me to redo my other low volume sites.
I wrote this so that if I need to do it again I have my notes.
If you find this useful please share with your network.
